Cherries

Once again I’m reminded that Alizarin Crimson is a cruel lover when painting directly.  I was able to overcome the transparency of the pigment, but the lower reflected lights came out a little hot-pink and a little to bright in value. Welp… I have half a bag of cherries left so we’ll see what happens next time.

Color Studies 2

Two weeks ago I made a series of small (5″x7″ paintings) using a limited palette of red, blue, yellow, brown, and white.   This week I made another set of paintings using the same limited palette, but adding a warm and cool version of each color, and removing (mostly) the brown.

In some instances it made a much clearer painting.  See how much more pink the teddy bear is when I can use Alizarin Crimson instead of Cad Red Light.  In other areas it added some frustration since I had to both focus on color mixing, as well as color temperature.  Also – I’m learning that a concrete floor is not the best surface to work on.  I see some rubber pads from Home Depot in the near future.

The strongest paintings are Teddy and Cowboy.  The weakest is the evening Embankment.  The evening light was fading fast and I was rushing.

untitled sketch : Oil on canvasboard. 5"x7" 2015

untitled sketch : Oil on canvasboard. 5″x7″ 2015

untitled sketch : Oil on canvasboard. 5"x7" 2015

untitled sketch : Oil on canvasboard. 5″x7″ 2015

untitled sketch : Oil on canvasboard. 5"x7" 2015

untitled sketch : Oil on canvasboard. 5″x7″ 2015

untitled sketch : Oil on canvasboard. 5"x7" 2015

untitled sketch : Oil on canvasboard. 5″x7″ 2015

untitled sketch : Oil on canvasboard. 5"x7" 2015

untitled sketch : Oil on canvasboard. 5″x7″ 2015

Color Mixing Studies

Color mixing is, perhaps, one of the hardest elements of painting for me.  I can see (most) color accurately and know exactly what color I need for the painting… but how to get that color?  That’s a little trickier.

Many painters advocate using a limited palette.  That is, giving yourself only a few colors and mixing all else from there.  In the beginning of an experiment/practice program I started this week using only four colors: Cad Red Light, Cad Yellow Light, Ultramarine Blue, Burnt Umber (brown) and Titanium White.

It is at once liberating and maddening.  As you can see in the paintings below I’m able to get reasonably close to certain colors.  Some – the pink in the teddy bear – were virtually unmixable given the 4 colors were all fairly warm colors.

Next week I will add 3 more colors – giving myself a warm and cool version of each color.  As the colors above are mostly warm I will add Alizarin Crimson (cool red), Hansa Yellow Light (cool yellow), and Cerulean (warmer blue).

As for the subject matter… I looked out the window and around the studio for random things to paint.  I’m still working on a lighting solution for the new studio.  The overhead lights are halogen and very yellow – making it virtually impossible to see what a color will look like when it goes from palette to canvas.

untitled sketch : Oil on canvasboard. 5"x7" 2015

untitled sketch : Oil on canvasboard. 5″x7″ 2015

untitled sketch : Oil on canvasboard. 5"x7" 2015

untitled sketch : Oil on canvasboard. 5″x7″ 2015

untitled sketch : Oil on canvasboard. 5"x7" 2015

untitled sketch : Oil on canvasboard. 5″x7″ 2015

untitled sketch : Oil on canvasboard. 5"x7" 2015

untitled sketch : Oil on canvasboard. 5″x7″ 2015

untitled sketch : Oil on canvasboard. 5"x7" 2015

untitled sketch : Oil on canvasboard. 5″x7″ 2015

Painting in the wilds of Maine

Its August, which means another trip up to one of my favorite places: Acadia National Park.  If you’ve never been Acadia is this weird mixture of almost primeval landscapes, early 20th century industry, and New England charm.

We stayed on the quiet side of the island, and I did 5 paintings in 6 days.  The weather was a bit uncooperative but that’s how it goes with painting in the wild.
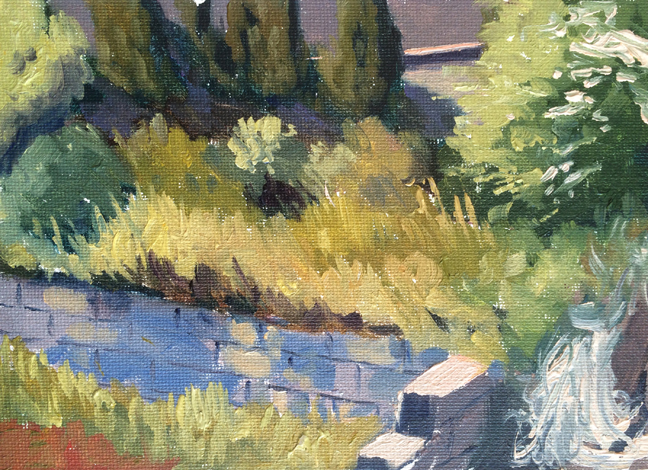
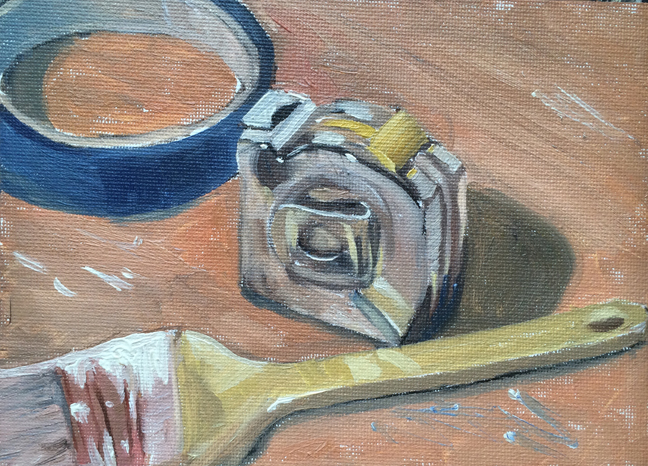
First Day : Blah.

untitled : Oil on board. 9"x12"  2015

untitled : Oil on board. 9″x12″ 2015

One of the biggest pressures I find is choosing a spot to paint.  I’m so seduced by the beautiful views that I want to paint them all, but that risks being repetitive.  I stopped at a dozen places before settling on this one.  The day was muggy and hot with a blazing sun, no shade, and no sunscreen.  I was rushing and things fell apart pretty quickly. I’m happy with the blues and browns in the water, and the olive green rocks to the edge.  Everything else is a mess. Unless I was emulating Marsden Hartley, in which case it’s great.

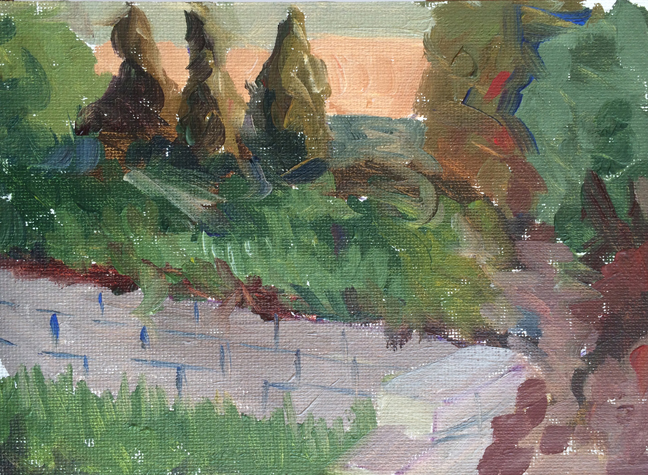
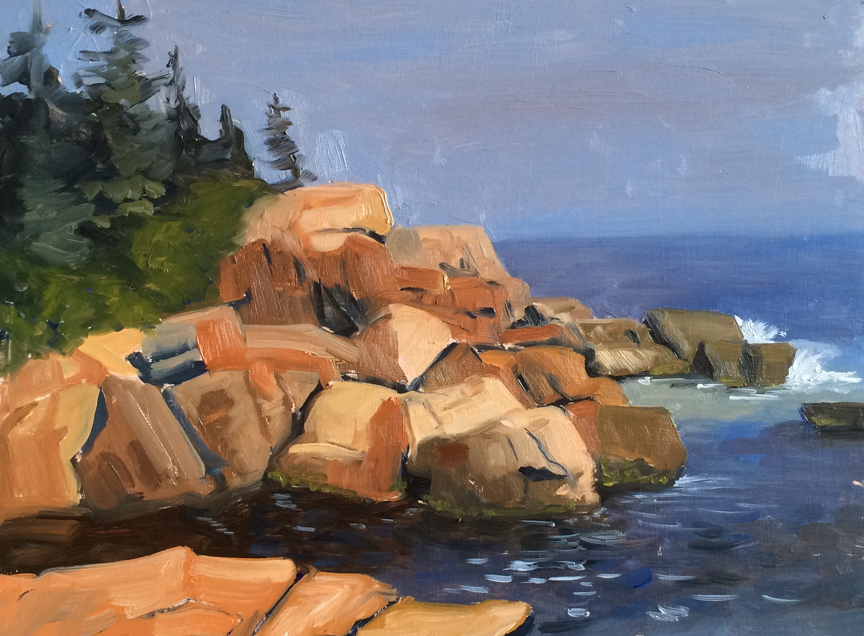
Second Day : Blah-er.

untitled : Oil on board. 9"x12"  2015

untitled : Oil on board. 9″x12″ 2015

The fog in Acadia is almost a living entity.  On Wednesday it rolled in and didn’t leave until Saturday.  This was off a little hike and while there are some areas that I really like – the almost impressionistic trees – the foreground is really bland.  I had meant to leave room to add in some dark pine boughs to frame the piece, which may help.

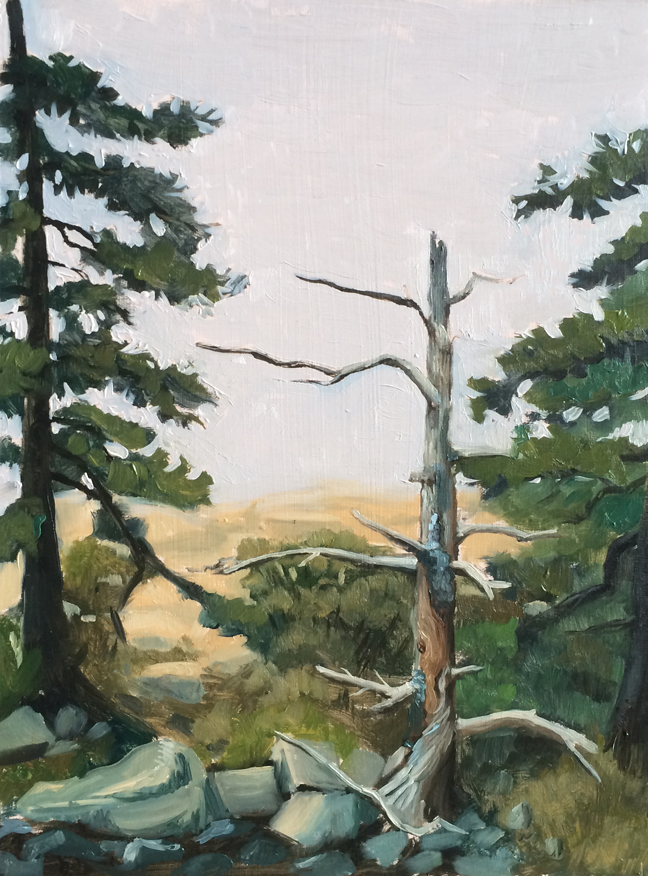
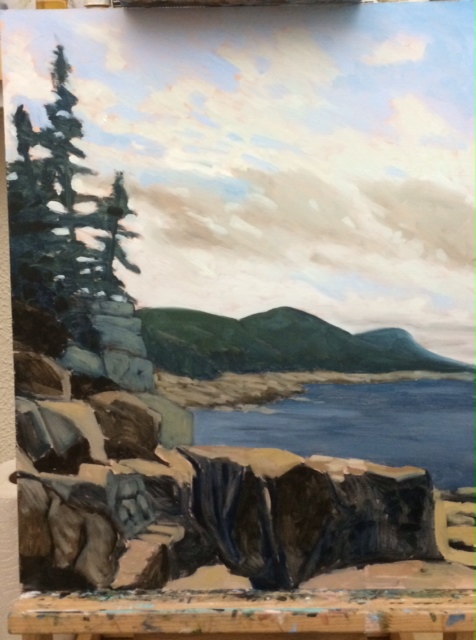
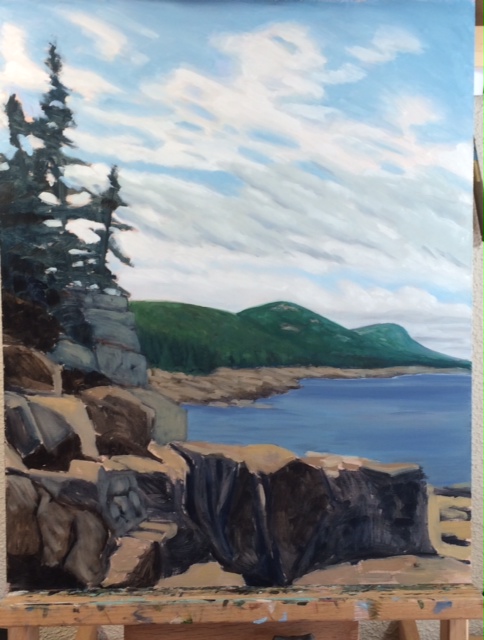
Third Day : More Fog.

untitled : Oil on board. 9"x12"  2015

untitled : Oil on board. 9″x12″ 2015

I dragged Lance along on another short hike out to the coast.  He set up a chair and read a book, I painted the only thing I could see through the fog – this stark dead tree.  I started thinking in terms of color temperature and I think it helped, although not much could save those poor plastic rocks in the bottom.

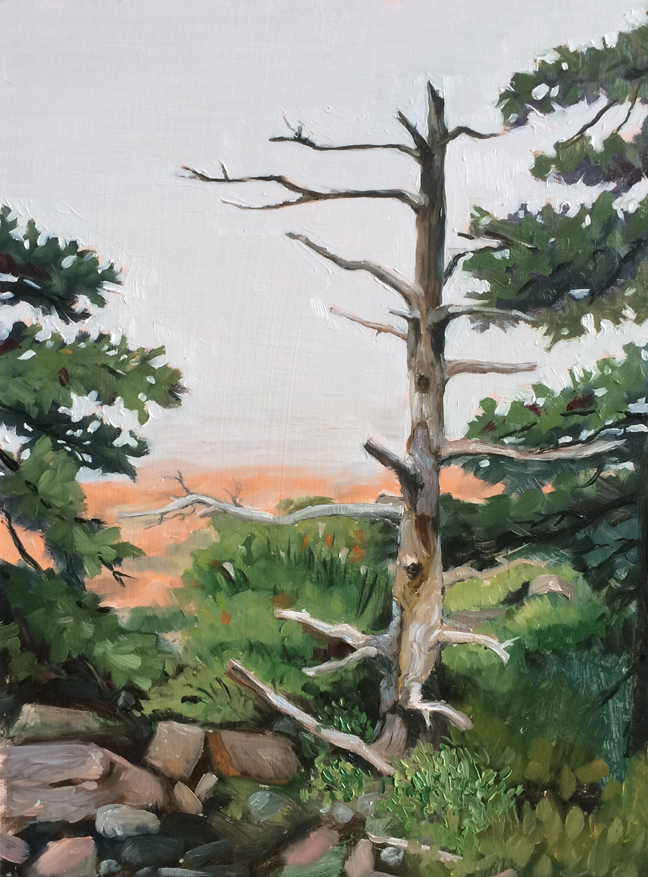
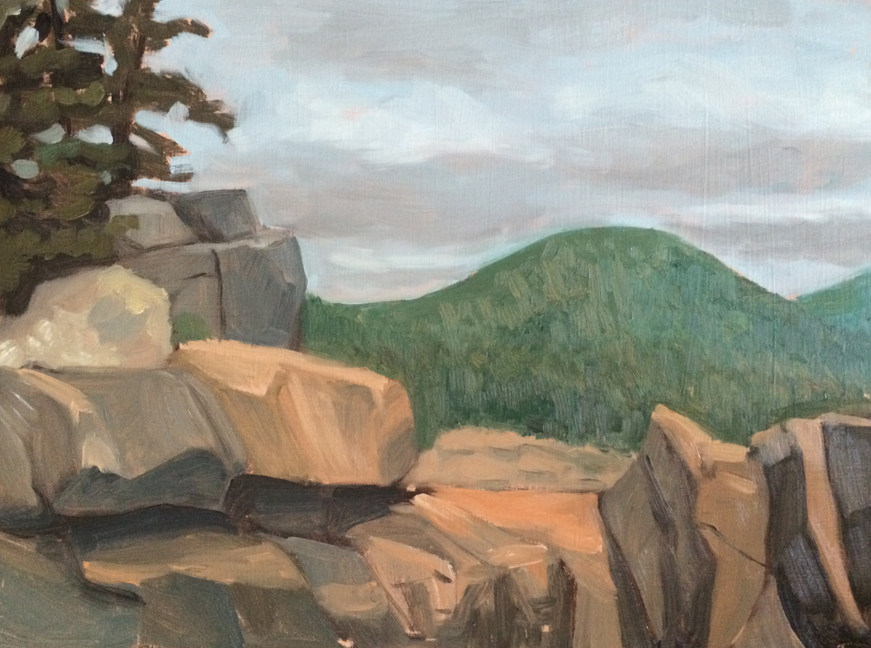
Fourth Day: More Tree

untitled : Oil on board. 9"x12"  2015

untitled : Oil on board. 9″x12″ 2015

After I paint I often find myself staring at the painting or a photo of it and wondering what I could have done better.  In the case of the tree I was really unsatisfied with the rocks, and I felt the branches in the earlier painting didn’t convey the shadows properly.  I also thought the tree to the right side had gotten muddled and lost.

So I went back again and set up in the same spot.  I trimmed the composition a little closer and tried to be as careful and deliberate as I could.  It’s a much better attempt, but those goddam rocks still feel plasticy and amorphous.

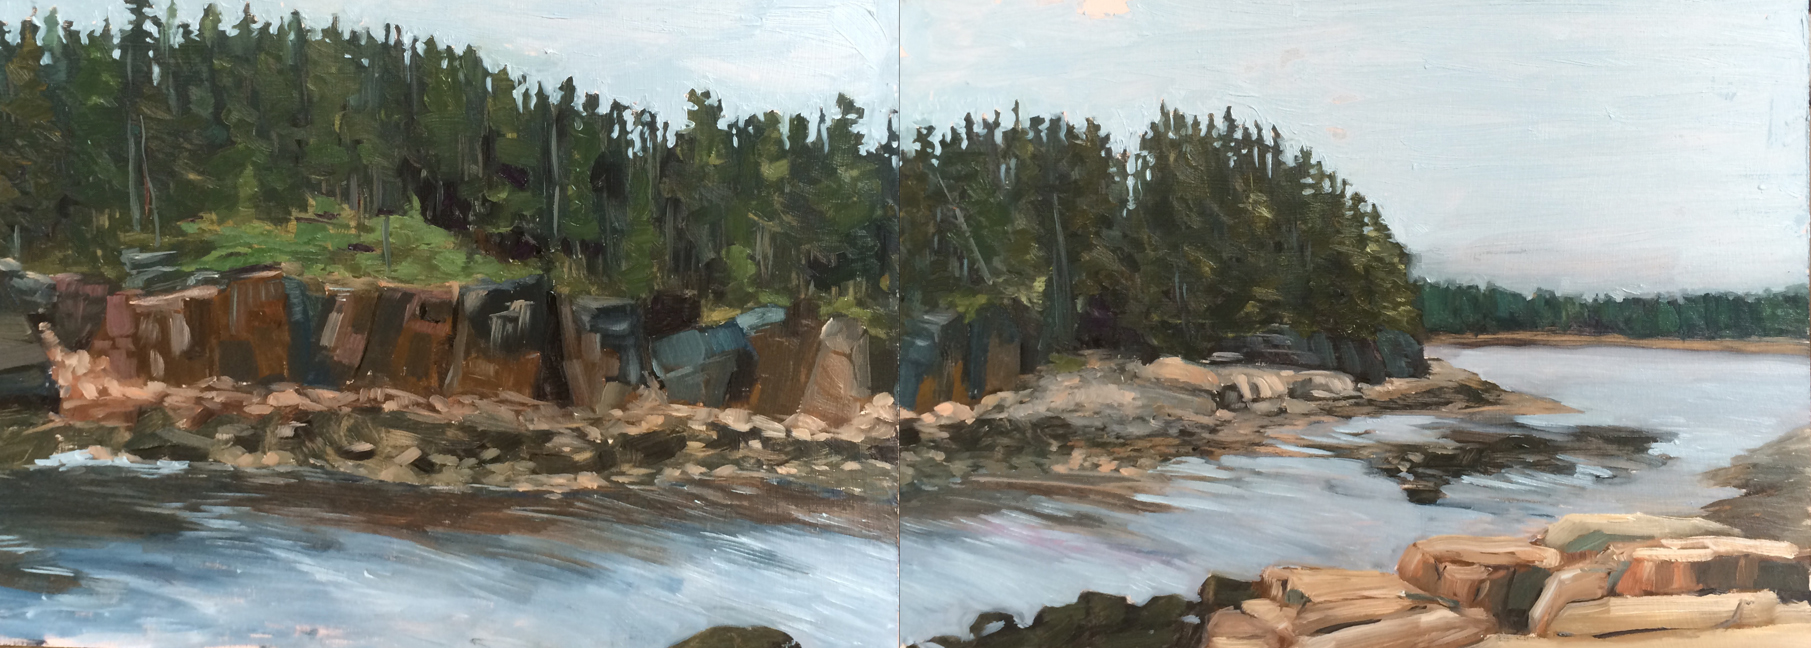
Fifth Day : More cliffs.

untitled : Oil on board. 9"x24"  2015

untitled : Oil on board. 9″x24″ 2015

This is from the same area I hiked all week.  I was tempted to go back and do more dead trees, but honestly it was getting a little depressing.  This was an ambitious piece – two panels side by side, and completed in the time it normally takes me to do one.

I’m very happy with the interplay of colors on the cliffs. I struggle a lot with the rock colors becoming too chalky or too orangey (see above).  I think these are one of the best representations I’ve done so far.  The tree line is a little too swoopy and the water got away from me.
I was on an exposed part of the trail, which meant I had a lot of audience for much of the painting, which can be a little distracting. There was also a potential thunderstorm on the way which urged me along.  I finished painting just as the first drops of rain fell.

Big Painting / Little Painting

I had done this horrid little sketch while up in Maine. While none of the paintings I did there were spectacularly successful this particular one stood out as particularly bad, for many many reasons.

Untitled : Oil on board. 9"x12" 2014

Untitled : Oil on board. 9″x12″ 2014

After staring at it for a few days and making notes of all the disastrous errors I decided to try again; I would consciously and carefully rework the idea.

I photographed the process and the results are interesting (at least to me).  Stepping back from the immediacy of the situation allowed me to understand what went wrong the first time, and to actively correct it (for the most part) this time.

First was the drawing.  I had rushed the drawing on the sketch, and my brain pulled one of those classic tricks: it said “wow those hills are dramatic” and instructed my hand to make them very dramatic. The result is a cartoonish exaggeration of what my eyes actually saw. Yes, the hills had a sharp rise, but that was visually tempered by distance and atmospheric perspective.

Step One: Drawing and blocking in.  I spent almost as much time on this step alone as I had on the entire sketch above. I focused on the subtleties of the shapes of the hills, noting that they weren't just symmetrical bell curves rising from the rocks.

Step One: Drawing and blocking in. I spent almost as much time on this step alone as I had on the entire sketch above. I focused on the subtleties of the shapes of the hills, noting that they weren’t just symmetrical bell curves rising from the rocks.

Step 2. I solidified the hills and pushed them backwards with cooler blues & greens.  I also "fixed" the sky... which was my biggest regret.

Step 2. I solidified the hills and pushed them backwards with cooler blues & greens. I also “fixed” the sky… which was my biggest regret.

Step 3.  More work on the hills and a great amount of focus on solidifying the rocks in the foreground.  I also continued to fuck up the sky...

Step 3. More work on the hills and a great amount of focus on solidifying the rocks in the foreground. I also continued to fuck up the sky…

Step 4. I reworked the water, which had been a little flat and a little too blue.  I added some texture and depth to the shore as it receded.

Step 4. I reworked the water, which had been a little flat and a little too blue. I added some texture and depth to the shore as it receded.

Step 5. I finally got the sky somewhere manageable - although not nearly as beautiful and soft as the initial blocking...I also brought in the highlights on the rocks in the foreground.

Step 5. I finally got the sky somewhere manageable – although not nearly as beautiful and soft as the initial blocking…I also brought in the highlights on the rocks in the foreground.

Final.  The last steps were to painting the greenery and trees.  I'm about 85% happy with it.  I still think the sky got mangled and some of the greenery is a bit amateurish.

Final. The last steps were to painting the greenery and trees. I’m about 85% happy with it. I still think the sky got mangled and some of the greenery is a bit amateurish. The photograph doesn’t capture the subtle blues in the foreground shadows.

Weekend Fun

This past weekend I did a little cloud study from a photo and some notes that I took when we visited Salem, MA a couple weeks ago.  I timed myself at an hour and the results were good, but feel kind of… eh.. to me.

Cloud Study (Salem) : Oil on board. 8"x10" 2014

Cloud Study (Salem) : Oil on board. 8″x10″ 2014

So I picked up a few of my books on color theory and began reading through some of the key points again,and I think what really sticks out as good advice is to consciously make a decision about what the colors in your paintings are going to be.   Yeah – sounds obvious and an artist has to do that anyway right?  Kind of.  If I’m painting a sky initially I’m going to respond to the color I see before me, and the colors that are in the photo reference.  Except I don’t have to.  With some forethought and decision making I could make the same sky purple, yellow, or red and still have the potential to have good results.

So as an exercise I painted out a Munsell color wheel and value chart to keep around the studio.  Munsell forwent the traditional color wheel of Red, Yellow, Blue (primaries) and Green, Orange, Purple (secondaries).    His color wheel has five primaries and five secondaries, allowing a greater nuance of complimentary coloring.   The tints in the middle of mine are a bit dark, but it is a useful tool to keep about.

Munsell Color Wheel.  Oil on plywood. 8"x10" 2014

Munsell Color Wheel. Oil on plywood. 8″x10″ 2014

Zorn Palette Experiment

This painting is a 1 hour sketch of my little suede teddy bear using the Zorn palette.

Anders Zorn was a Swedish landscape and portrait painter – a contemporary and competitor of John Singer Sargent and Joaquin Sarolla y Bastida.  Zorn often (but not always) limited his palette to just four colors: ivory black, flake white, yellow ochre, and vermillion red (I swapped in Cad Red Med.)

Limiting a palette is always an interesting challenge because you are forced to work less on perceived colors and more from value, form, and color temperature.  The Zorn palette actually gives you a great range of tones, both warm and cool.

I painted teddy after doing the color chart.  My palette was full of all of the mixtures and I think I probably should have limited them even further.  Also – canvas paper sucks.  Literally.  I would put down a brushstroke and it would get sucked into the tooth of the canvas almost immediately. For the next experiments I have added extra gesso to the paper to help seal it up.

Zorn Palette Teddy : Oil on unmounted canvas. 2013

Zorn Palette Teddy : Oil on unmounted canvas. 2013

Zorn Palette.  Colors are mixed 3/1 approx.

Zorn Palette. Colors are mixed 3/1 approx.